🐚
2025.04.22 - 2025.05.18
Qistina Nuralya Maria Binti Azly / 0354180
Sonic Design / Bachelors of Design (Honours) in Creative Media / Taylor's University
PROJECT 1: AUDIO FUNDAMENTALS
Table of contents (Quick links)
1. MODULE INFORMATION BOOKLET (MIB)
Week 1 - Week 2 - Week 3 - Week 4
1. MODULE INFORMATION BOOKLET (MIB)
This is the Module Information Booklet for this module:
2. LECTURES
Week 1
Physical Class
For our first class, Mr. Razif briefed us what to look forward to during this module which included all the different assignments and exercises. Something I really looked forward to was the final project whereby we'd have to create the sound effects for a video game clip ourselves.
Lecture Video(s) - Sound Fundamentals:
Sound: a vibrations of air molecules that stimulate our eardrums
Three phases of sound:
PROPAGATION
PERCEPTION
The vibration of the air molecules and its movements are called soundwaves.
Human Ear

Outer ear: external and visible portion of the ear and ear canal.
Middle ear: houses the paper-thin eardrum and a small, air-filled cavity containing three tiny bones (malleus, incus, and stapes)
Inner ear: the cochlea (hearing canal), endolymphatic sac, semicircular canals
Pscyhoacoustics
The study of subjective human perception of sounds including how we listen, our emotional reactions, and the physiological effects of sound and music on the human nervous system. The perception of pitch, loudness, volume, and timbre are some of the classic psychoacoustic concerns.
- Wave lengths: the literal distance between phases.
- Amplitude: the strength or power of a wave signal. Higher amplitude = Higher volume.
- Frequency: the number of times the wavelength occurs in one second. The faster the sound source vibrates, the higher the frequency.
6 properties of sound
- Pitch
- Loudness
- Timbre (Quality of Sound)
- Perceived Duration
- Envelope
- Spatialization
Reflection:
Learning about sound made me realize how much I take hearing for granted. To think something as simple as air molecules vibrating in specific frequencies could actually make something of substance is cool.
I also found psychoacoustics really interesting. Finding out the things we hear can affect us emotionally too made me rethink all the music I've ever heard in my life whether it be standard Bossa Nova, dramatic musical soundtracks (Greatest Showman) or hard-hitting game music (Undertale). I always thought music just happened to entertain the tiny music worm in my brain but it's fun to know now the actual technical and biological reasons behind sound.
From the supplementary video, I have also slightly learned how to differentiate specific frequencies from one another. Though I still have a way to go since some frequencies still sound the same to my ears. Will definitely do the exercises the video recommended though to help train my ears better!
Week 2
Physical Class
We did our Exercise 2 where we all tried sound shaping an audio file to fit in a telephone, closet and walkie-talkie setting.
Lecture Video(s) - Sound Design Tools:
Sound Design Tools are similar to that of tools in common illustration programs; i.e. the Lasso Tool in Photoshop. Though the tool can be found in other programs as well, it still serves as a simple and flexible tool for designers to use to their creativity's extent.

In terms of sound design, we have 5 different common steps (not necessarily in order or used together):
- Layering : taking multiple sounds and placing them on top of each other (similar to layering in graphic design)
- Time-Stretching : sonically stretching audio within set parameters without changing the pitch.
- Pitch Shifting : changing the pitch of the audio (higher pitch = thinner sound, lower pitch = bigger/more bass) without changing its length.
- Reversing : giving audio a weird or unnatural characteristic based on intention
- Mouth it! : vocalizing a sound when the intended sound isn't able to be satisfactorily achieved through other methods.
Reflection:
The first lecture video was sort of a recap for me because I'd taken Video Sound Production two semesters ago so things like Pitch Shifting and Layering were familiar to me but the other 3 were in my general knowledge of sound design but I never really went into that much depth with it. The thing that really caught my attention was the "Mouth it!" step because it reminded me of acapella music (mainly Pentatonix) where the songs' instruments are replaced with vocals/sounds created by the singer's mouth. Maybe it's not a proper 1:1 connection but it's fun for me to imagine myself trying to create a sound effect like an explosion purely with my vocals (—ᴗ—)
One of the important points I gathered from the second lecture video (The Art of Sound Design) are that of an example of good sound design process:
- Atmospheric sounds (e.g. wind, city traffic)
- Subject sounds (e.g. footsteps, chatter)
- Additional sounds (e.g. birds chirping, bicycle ringing)
Other than that, the video also points out some mistakes that I've made in the past with sound design like not keeping my audio level on my computer at a constant 60-70% volume when sound designing. He mentions that most people are only gonna hear the audio through their 50% volume-set phones so the 60-70% is a good range to ensure everyone is able to hear the sounds.
Overall, both lecture videos have a point in common and that is to keep experimenting and be creative with my sound designs ദ്ദി ˉ͈̀꒳ˉ͈́ )✧
Week 3
Physical Class
We were introduced on how to make audios sound like they were actually in the space we're in; like how a person on the phone is talking while moving from your left to right will obviously determine where the sound will end up (the left ear, right ear or both). We also learned about clip/track mixing in which we were told that track mixing would be convenient in the case we wanted to change the sound effect but not change the timing of the effects added onto the whole track.
After that, we were split into groups to go and head to the Audio Recording Studio at D3.03. Mr. Razif showed us the two different parts of the studio; the control room and the live room.

Lecture Video(s) - Sound in Space (Environment) :
There are two basic types of sound in film: Diegetic and Non-diegetic.
Diegetic: Sounds that characters within the film can hear even internally in their minds. Internal diegetic sounds can consist of thoughts, narration, music etc. The purpose of diegetic to help establish and create the world around the characters.
Non-diegetic: Sounds that characters can't hear; like sound effects, some kind of narration (not from a character) or musical scores. Non-diegetic sounds help to add emotion and movement to the film.
But sometimes sound can actually switch between diegetic vs non-diegetic, which is called Trans-diegetic sound. This often helps to blur the line between fantasy and reality.
Reflection:
The first thing the video mentions is that we often overlook sound in film
because we just expect the sounds to be up to our expectations and we only
focus on visual aspects of the film... But sound plays a very VERY crucial
role in the immersion of the viewer with the film. I've started to pay more
attention to sound when I started Video Sound Production two semesters ago
and I'm now remembered of a past experience I've had with sound effects in a
film that left me with a sour taste in my mouth sound
in my ear.
Back when Mat Kilau (a Malaysian film) premiered, there was a specific scene where many people were fighting with their swords or keris. Being in the theatre, I couldn't help but realise how ear-piercing and high-pitched each sound effects for the clash of the swords were on my ears. It didn't help that because of them fighting, that ear-piercing sound kept repeating again and again. At one point I just had to cover my ears with two fingers. Maybe it was a creative choice to make the clashing sounds as loud as it was but it still soured my experience with the whole film. (The whole film was okay but that experience in the theatre with the sound effect just left the worst impression in me)
This just shows how important it is to be mindful of the use of diegetic and non-diegetic sounds because who knows what could break the viewer's immersion even if it was just that volume and pitch slider.
Week 4
Physical Class
Feedback session for Project 1
Lecture Video(s) - Soundscape :
Soundscape is a scenery created by sound. We often try to associate sounds mixed together into a coherent scenery in our heads; which can include sounds like the sound of a cash register (ka-ching!) or a cow (moo...).
Soundscape can tell the viewer about the scene's :
- Distance
- Space
- Direction
- Temperature
- Weight
- Time/Era
- Emotion
- Concept of Nostalgia
This association of sound is either learned or instinctually instilled .
Reflection:
I found the short and sweet video about soundscape to be entertaining yet also informative. It portrayed nicely information about soundscape and even got me with the "Direction" test since I had a bit of a jumpscare when I heard the deep knocking in my right ear (ᵕ—ᴗ—). It was also interesting to learn about how our brains are actually wired to think certain things when hearing different pitches of sound. Like how most tiny cute things in media have high pitched voices/sounds to them (Navi in Legend of Zelda) and most big, burly and often intimidating things have low-pitched voices or sounds associated to them (Mor'du from Brave).
3. EXERCISES
3.1 Week 1 - Equalizing Sound
During class, Mr. Razif talked about how commercial headphones often has more bass to give the user more immersion. However, this bass is added onto the original audio which means we aren't really hearing the real audio. Hence, we had test out our headphone's output quality by equalizing these audio files provided by Mr. Razif:
I conveniently had one of the recommended headphones (Audio Technica ATH-M30x) to use for this module so listening to the audio was nice and clean.
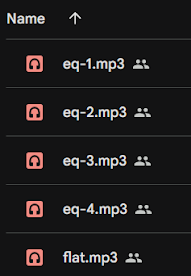
We opened up Audition to start the exercise. Our full task was to equalize eq-1.mp3 to eq-4.mp3's audio and match it with flat.mp3 (Fig 3.1.1) whether it be changing their bass or treble; all of which we were to adjust with the Parametric Equalizer.
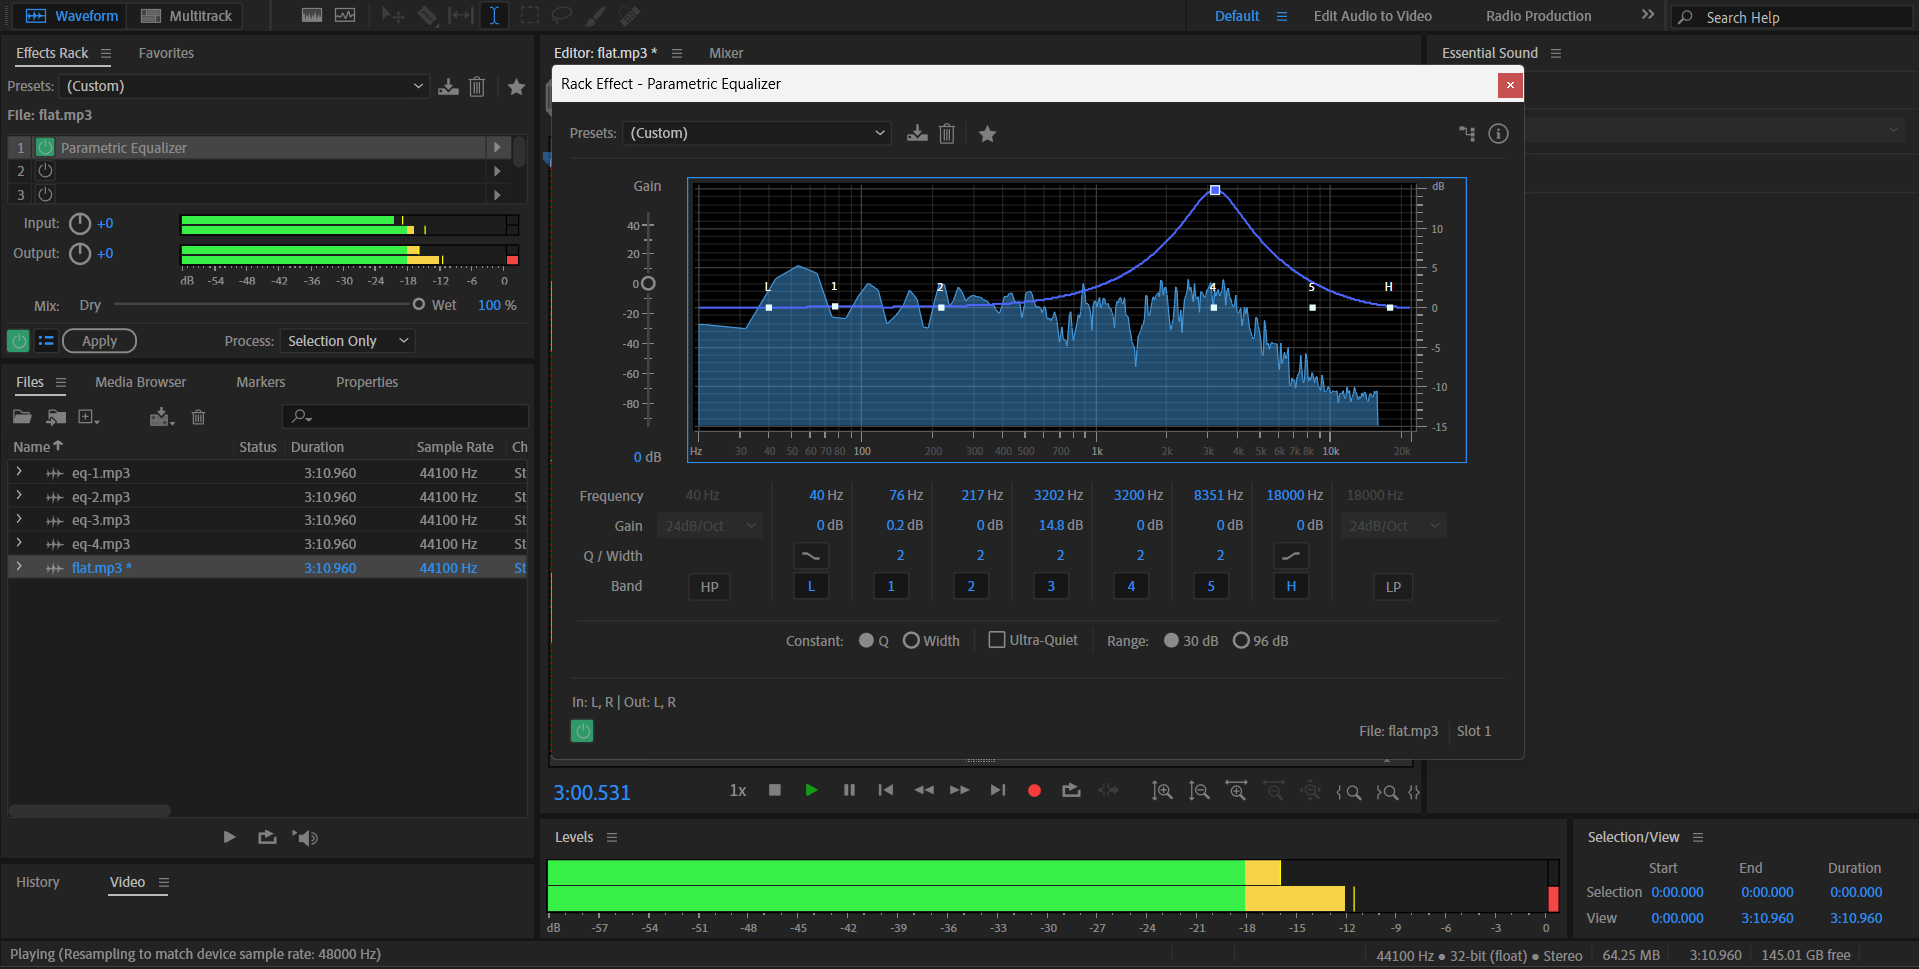
It was fun but also tricky at first trying to match all the EQ's to, as closely as I could get, match with flat. But, having the ending satisfaction of not being able to hear much more differences between the audios signifying me matching them nicely made it a nice exercise (ᵔ⤙ᵔ)
The following 4 pictures are of all the different Parametric Equalizers for each EQ.
EQ-1

EQ-2

EQ-3

EQ-4

3.2 Week 2 - Sound Shaping
During class, we started to play around more with the Parametric Equalizer to shape the provided audio below to sound like it was in different settings.

For the first three settings, we shaped the audio into Telephone, In a Closet and Walkie Talkie. The following are the EQ's of all the different settings
Telephone:

The idea behind the telephone setting is that the audio would be thinner, has a slight static-ness and also lose a bit of its bass. The end result sounds like it came from a slightly out of date telephone (—ᴗ—)
In a Closet:

Since closets are enclosed spaces, audio doesn't really travel far. So, the audio is a bit more flat and muffled as the POV is from outside the closet.
Walkie-Talkie:

For Walkie-Talkie, the goal of the EQ was to add distortion to the audio as well as boost the static/hiss of the audio to imitate the voice quality of an actual walkie-talkie. It is also noticeably louder than the previous EQs due to the distortion as well.
~~~
Afterwards, we started playing with the Reverb settings of the audio (alongside EQ as a base) and were tasked to do a Bathroom, Stadium and Airport/Train Station setting for the audio.
Bathroom:

The bathroom was a simple one, with basically just adding some delay time and also give some reflection to the audio to simulate the bathroom vibe. Since it's an enclosed space, there shouldn't be too much echo too.
Stadium:

I started playing around with some presets of the Full Reverb settings and tweaked the Football Referee preset by making the audio a bit more clearer and also tweaking the Decay Time and Perception to imitate the multiple loud speakers announcers would use in stadiums.
Airport:

Similar to Stadium, I took a preset and added a few changes to the settings. For Airport, however, because it's supposed to be an announcement-esque audio in a large yet enclosed space, I decreased the Room Size to fit with the Airport environment. All-in-all, the Airport version is similar to the Stadium but with sharper audio since the sound isn't escaping anywhere outside.
Download all the audio files of this exercise here.
3.3 Week 3 - Sound in Space
The task for this exercise was to learn to place sound in a space and to create believable change in direction and distance to the sound. We started with a simple (but very loud) Jet Plane audio.

The initial Jet Plane Audio played on both sides of the headphones. So to start, this was the first test where we did a simple direction and also volume change by clip mixing. Here I learned that the edits I made to the clip will only stay IN the clip and won't affect the whole track.
Following that, we also did a track mixing version of the Jet Plane audio (Fig 3.3.2) but for me it was mostly experimental so the audio isn't as "believable" or realistic.


Audio Preview:
Next, we had to try out track mixing on the sample voice audio from the previous exercise. The scenario was that the person would be slowly walking towards us (from left or right) and towards the opposite direction and into a cave.
Adjusting the Pan and volume were easy but adjusting the EQ and Reverb felt slightly tedious and "technical" in a sense. I had to manually change each part (mainly the gain) of the Parametric Equalizer and also add the keyframes for when the effects would be in effect. Same process went for
For our homework, we had to do create spatial sound one of the following pictures:

I decided to go for Laser Engine because I was interested in directing to make the big and loud sound for the laser.
I started off by listing down the order in which the sound effects would be heard:

Then I went to both BBC Sound Effects and Freesound to find and download the almost perfect sound effects/ambience that I'd use for the exercise.

To keep a good organising habit, I also renamed the source files so that it would be easier for me to identify each sound effect on the track.

Before I started editing anything, I placed the audio files into their designated track like keeping the ambience at the bottom so that it wouldn't disturb the main focus of the audio session.

Then, since I couldn't really find/describe the sound effect I wanted for when the laser abruptly stops/shuts down, I went and took the "Fan Garage" audio and reversed a section of it and also lowered the pitch and shortened the time to achieve a short and deeper "shut down" sound effect of sorts.


To make the sound effects actually sound like it would be in the space within the provided visual, I added reverb to some of them.

I also added panning to most of the audio clips (mainly the main sound effects) but primarily I wanted to experiment with one of the clips and that was with the "Fan Garage" or the laser engine startup sound. I made it so the audio flicked between left and right rapidly to create a cool "3d-ish" effect to the sound.

Final Audio:

Audio Preview:
Download all the audio files of this exercise here.
4. REFLECTION
These exercises made me realise how I really enjoy sound design. Granted, maybe my skills aren't up to par with professionals (yet), I still found the process of editing sound to be really entertaining!
Especially in Exercise 3 where we had freedom to create our own soundscape for one of the visuals we chose. I'm the type of person who, when listening to music, often imagines a whole scene in my head happening alongside the music. Whether the music is upbeat or melancholic, I will always be able to find or create scenes in my mind to match them.
All that being said, I guess I put that "skill" of imagining things with audio to use during the sound scaping process especially when it came to thinking of when and where the sounds would come in/from. Though I will admit, some of the more technical side of things annoyed me here and there with sounds glitching sometimes but it didn't annoy me enough that I started hating the process.
Of course, the other two previous exercises were good as well but they were more towards learning the basics that helped me more in Exercise 3. Overall, I really enjoyed Project 1 and am definitely looking forward to Project 2 since it's nearly the same as Exercise 3 here ◝(ᵔᗜᵔ)◜
🐚
Comments
Post a Comment